Adding a store locator to your WordPress site is a breeze with this simple plugin.
Tip: Recent versions of WordPress make it easier to integrate Blipstar so this plug-in is no longer required.
Instead, you can do it this way.
Instructions
Download the plugin from the WordPress plugins site.
Go to your WordPress admin Dashboard and click Plugins.
The Blipstar Store Locator plugin should be shown in the list. Click Activate to turn it on.
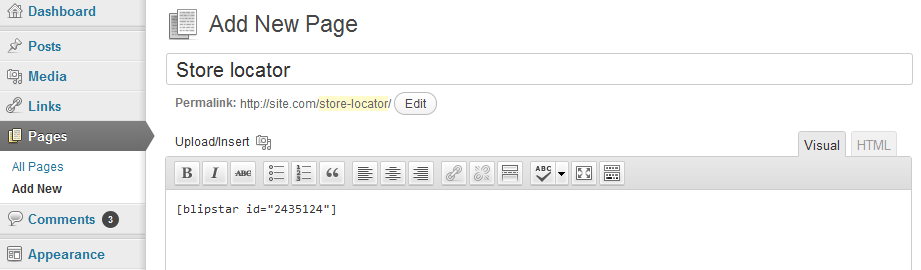
In WordPress, go to Pages and click Add New
In the new page enter the following shortcode: [blipstar id='###']. (Replace the ### with your Blipstar account id).
Save the page - and view it. Your store locator should now be visible.
And you're done!
Once the plugin is installed, adding your store locator is as easy as writing one line of text (see screenshot for an example). Make sure you enter your account id exactly as written or even easier: visit this page when logged in and it will fill in your account id automatically.
Versions
Version 1.0 was the initial release.
Version 1.1 fixed a small bug.
Version 1.2 added the ability to display all locations on a map.
If you encounter any issues or have any suggestions to improve the WordPress store locator plugin then please get in touch and we'll be happy to help.


